Welcome to this weeks post with Heartfelt Creations.
I hope you are having a wonderful week so far. I made a very unique mixed media project this week, and I am including a photo tutorial. This is my first tutorial so bare with me while I am in the learning process.
I hope you are enjoying the new All Geared Up Collection. Stop by Heartfelt Creations Blog for all of the creative projects this week.


Products Used:
All Geared Up Paper Collection
All Geared Up Die
Shifting Gears PreCut Set
All Geared Up Background PreCut Set Grand Calibur
Art Institute Glue - Dries Clear
Spellbinders Tool N' One
Double Dots 100pc.
Moss Green Metallic 3D Stamp Paint
Silver 3D Stamp Paint
Essential Glue Pad
Paper Blossoms Molding Mat
Paper Blossoms Tool Kit
Project Instructions:
Other Products: RRR 1/2" white seam binding - 1/2" Burlap woven Ribbon, Distress Inks Black Soot - Fired Brick - Peacock Feathers - Squeezed Lemonade, sponging tool, silver embossing powder, heat tool, nuts, bolts, gold beads, springs, washers, cardstock white - black (CS), Inktense water color pencils, paint brush, Glimmer Mist Lemon Zest, Dylusions, White linen, dress form, cogs and wheels, hot glue gun, three turquoise and gold beads.
Instructions: Take a 12" by 12" piece of designer paper (DP) from the All Geared Up Paper collection. Randomly drip white linen on the front. Ink the edges with black ink. Take the Grunge stamp and the Distress Inks and stamp it around the edges. Stamp the background stamp with the glue pad then add embossing powder. Heat set, then paint the image with water color pencils and the paint brush. Add Double Dots to the back. Take the All Geared Up die and cut five large gears and eight small gears in white CS. Take the Distress inks and randomly sponge each one, then add the Black Soot to the edges. Glue one small and one large together. Cut four small gears and three medium gears in black CS. Cut the three sentiments from the paper collection, and sponge with the Distress inks. Cut three sets of chain links with black CS. Take the dress form and sponge on the 3D Stamp paints. Stretch the springs out to make them longer. Add all of the elements as shown in the photo. I will have a photo tutorial of this wall hanging on my blog.
Celebrating You Photo
Tutorial
Take
your 12" by 12" All Geared Up, designer paper and take the Dylusion's White Linen and add
some drops of it over the page. Then add the burlap ribbon.
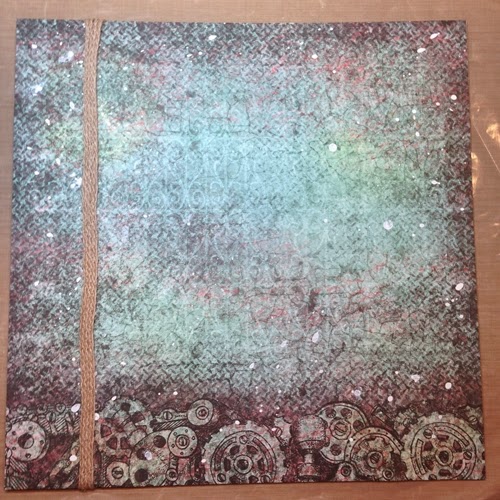
Take
the Black Soot and sponge the edges of the DP.

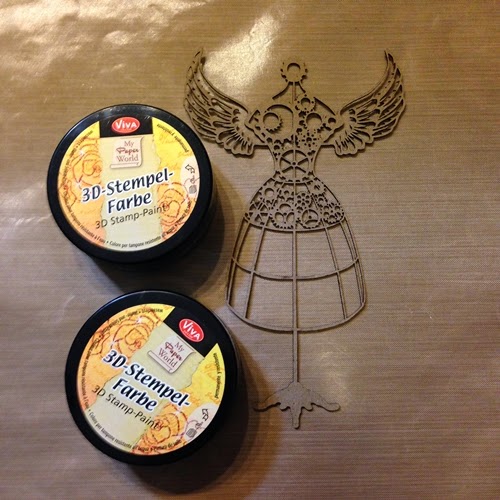
Take
the chipboard dress form and lay it on your craft mat, then sponge it with
Silver and Moss Green Stamp paint.
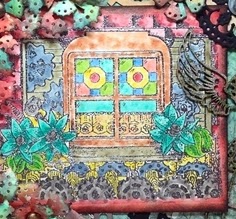
Stamp the image
with the glue pad and then heat emboss it with silver embossing powder. This is
very helpful when you want to use watercolors to paint with. It will keep your
color in each area, instead of it running into other areas. Take a paint brush,
and add water the each area. Then add take your brush and touch it to the
pencils, and then to the image. It will immediately fill the area with color
because of the water you added first.
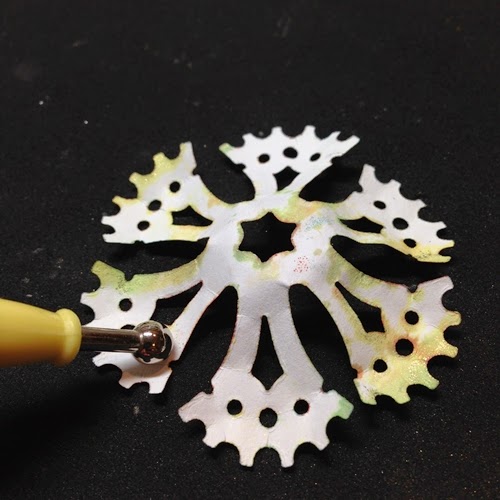
Cut the gears
in white CS then lay them on your craft mat and sponge them randomly with
Distress inks.Peacock Feathers, Squeezed Lemonade, and Fired Brick. Next
spray Lemon Zest, Glimmer mist on them, and a few random White Linen, paint
drops
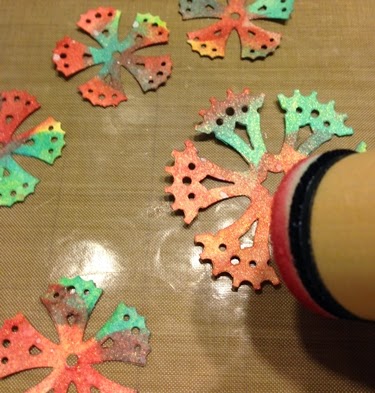
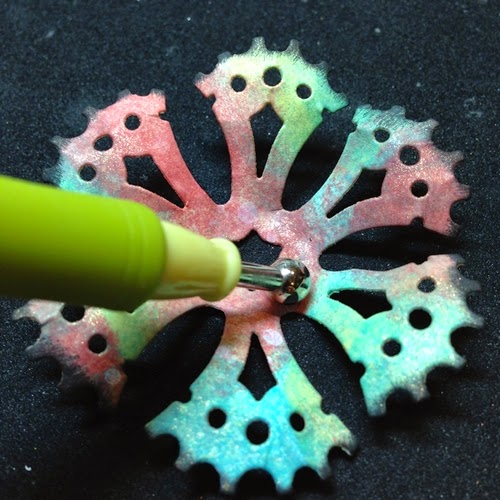
Take your
stylus and turn the flowers over and push down on the Tips of the gears. Then
turn them back over to the front and press down with your stylus in a circular
motion in the center. Add one small and one large gears together to make a
flower.
Place all of your elements on your page without
gluing them, to help you decide how you like them. Like I did in this photo.
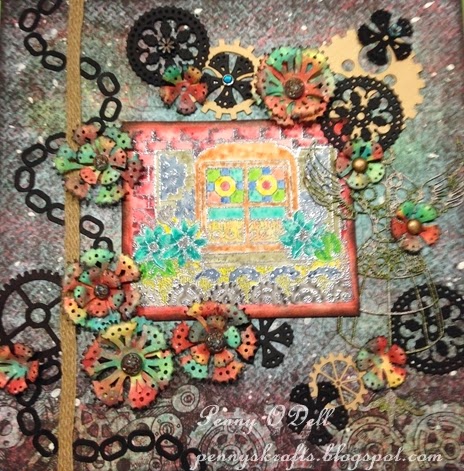
When you are
done and like the way things are arranged glue everything down, and you are
done.
I hope you
enjoyed this tutorial.
If you have any
questions please feel free to ask.
No comments:
Post a Comment