Welcome to my blog. I would like to create a place where I can share my love of crafts with you. I started paper crafting in August of 2011. I just had my one year anniversary. I love making cards, doing scrapbook pages, creating flowers, quilling and many other crafts. I found out about greeting cards when watching a Stamp TV video a few months later. I am hooked on card making now. Love everything about it. I hope that you will join me in my love of crafts.

Wednesday, December 9, 2015

December 12, 2015 HC

Welcome to this weeks post with Heartfelt Creations.We are debuting the 
What an amazing collection of papers, stamps, and dies. I love the rich colors and those adorable coffee cups. This collection would bring a smile to anyone's face.
Stop by Heartfelt Creations blog to see all of the inspiration from the rest of the Design Team.


Products Used: 

Project Instructions: 

Other products: Black, blue cardstock (CS), blue rhinestones, colored pencils light and dark brown, blue
Instructions: Take a piece of the Coffee Talk paper collection and cut a 6" by 6" card base. Take another piece of the paper collection, trim it to 5 1/2" by 5 1/2" and stamp the Coffee Talk background stamp in black ink. Color it with the colored pencils, and add it to the card base. Cut two of the matching boarder dies. One in blue and one in black. Glue them together and then add them to the card. Add blue rhinestones to the boarder. Stamp the All Stacked Up tea cups stamp on blue (CS). Cut it out with the matching die. Add Double Dots to the backs and add it to the card.

Thank you for stopping by my blog!!!
I really appreciate it.

Wednesday, December 2, 2015

December 2, 2015 HC

Welcome to this weeks post with Heartfelt Creations. I am still creating with the All Glammed Up Collection. It is an amazing collection.
Stop by Heartfelt Creations blog for all of the inspiration by the rest Design Team.


Products Used: 

Other products: 
Gold Wink of Stella, Copic Markers R83 - E37, red hemp, brown cardstock (CS), red rhinestones.

Instructions: Take a piece of the All Glammed Up paper Collection and make a 6" by 6" card base. Sponge it with rose ink. Cut the Scalloped Edges, from the Eyelet Oval Die, with brown CS. Then cut the Solid Center and Eyelet center from paper from the paper collection. Put them together then add Double Dots to the back. Stamp the All Glammed Up shoe in brown ink using paper from the paper collection. Cut it out with the matching die. Color it with the Copic Markers. Cut the matching card panels, tags, and ticket from the paper collection then sponge them with ink. Add Double Dots to the backs of the tags and ticket. Stamp twelve of the small flowers and six of the larger flower in black ink, on paper from the paper collection. Sponge the edges with rose ink. Add three of each flower to make a flower. Add rhinestones to the centers. Add all of the elements to the card, then take the Gold Wink of Stella and add it to the flowers and randomly around the tags, tickets, and card panels. Add a few more rhinestones around the card.


Wednesday, November 18, 2015

Welcome to this weeks post with Heartfelt Creations
I am using the All Glammed Up Collection this week. I used some embossing powders and rhinestones to make the shoes pop. I really had a great time creating this card. 
Stop by Heartfelt Creations and pick up your new collection today. Don't forget to take a look at all of the creative inspiration by the rest of the Design Team at 


Other products: 
Clear embossing powder, heat gun, hot fix green rhinestones, nail art flowers, red - white cardstock (CS), Spellbinders Ribbons Tag Trio.

Instructions: Take a piece of the All Glammed Up Paper Collection and make a top folding 5 1/2" by 4 1/4" card base. Trim a red piece of CS to 5 5/16" by 4 1/16", and add it to the card base. Take a card panel from the paper collection and trim it to 5 1/8" by 3 7/8" Add Double Dots to the back Stamp the tow shoe images on red CS in black ink. Cut them out with the All Glammed Up Shoe Die. Stamp the sentiment on white CS in black ink. Cut it out with the spellbinders die. Take the 12" by 12" border lace and roses, and trim it to 5 1/8". Cut around the lace with scissors. Glue them together and add Double Dots to the back. Add it to the left side of the card. Add Double Dots to the back of the sentiment. Glue the lace and sentiment to the card. Cover the two shoes with the Essential Glue pad, then add clear embossing powder. Heat set them with a heat gun, and repeat. Add the hot fix rhinestones. Glue the shoes down to the card as shown in the photo, and then add the two nail art flowers.
Thank you for stopping by my blog!!

Wednesday, November 11, 2015

November 11, 2015 HC

Welcome to this weeks post with Heartfelt Creations.
We are introducing the All Glammed Up Collection. I love it.
The shoe dies and stamps are so much fun to work with. the Beautiful papers, amazing stamps, and awesome dies make creating so easy.
I hope you enjoy this collection as much as I am. Don't forget to stop by Heartfelt Creations blog to look at all of the amazing projects by the rest of the design team.


Project Instructions: 

Other products: Red - white cardstock (CS), Copic Markers E 00 - 000 - 02 - 11 - 31 - 34 - 35, RV 21 - 22 - 29, YG 21 - 25 - 63, C 9, ribbon, brads
Instructions: Make a red 6" by 6" card base. Take the black script paper from the All Glammed Up paper collection and trim it to 5 7/8" by 5 7/8". Add it to the front of the card base. Take the matching card panel and trim it to 5 3/4" by 5 3/4" add it to the black layer. Stamp the All Glammed Up sentiment, and the Heels and Roses in black ink on white cardstock. Stamp one Heels and Roses on black cardstock. Color the image with Copic Markers. Add the black Heels and roses to the back of the colored image. Add a 1/4" black layer to the sentiment. Add Double Dots to the back of both images. Add them to the card. Add a bow to the shoe and the brads to the sentiment.

Thank you for stopping by my blog!!!

Wednesday, November 4, 2015

November 3, 2015 HC

Welcome to this weeks post with Heartfelt Creations.
Italiana Riviera Collection. I made a gift box this week. I just love the way it turned out. I hope you enjoy my creation this week and are inspired to create a gift idea of your own.
Stop by Heartfelt Creations blog for all of the inspiration by the design team.


Project Instructions: 

Other products: Lace, flower rhinestones, container
Instructions: 
Take paper from the Italiana Riviera Paper Collection, and cover the container. Take paper from the paper collection, and stamp six sets of the Arianna Blooms, with black ink. Cut them out with the matching die. Glue six flowers together to make five flowers. Add the flower rhinestones to each one. Glue the lace around the bottom and top of the container. Glue the flowers to the container as shown in the photo. Add a lace ribbon and a rhinestone to the center.

Thank you for stopping by my blog!!!


Wednesday, October 28, 2015

October 28, 2015 HC

Welcome to this weeks post with Heartfelt Creations
I hope you like the tag I made. Stop by Heartfelt Creations blog to see the projects by the design team.


Project Instructions: 

Other products: Purple cardstock (CS), Spellbinders Classic Oval - Scalloped Ovals, fibers, tag, eyelet
Instructions: Take a tag and cover it with paper from the Italiana Riviera paper collection. Stamp the Italiana Script across the front of it with black ink. Add an eyelet to the hole. Take the matching card panels, and stamp the Italiana Script onto each one, with black ink. Add a 1/4" border of purple CS. Add Double Dots to the backs. Take the oval and cut out the image. Take the purple CS, and cut the scalloped oval. Layer it on the back of the image and add Double Dots to the back. Stamp the grape clusters onto purple CS with black ink. Cut them out with the matching die. Glue them around the image and panels. Add fibers to the eyelet.

Thank you so much for stopping by my blog!!!

Wednesday, October 21, 2015

October 21, 2015 HC

Welcome to this weeks post with Heartfelt Creations. 
I am using the Italiana Riviera Collection. I made a card this week, and decided to use the leaves to make flowers. I really enjoyed the new idea, and hope you enjoy my card. This collection is really inspiring, and I hope it inspires you to create.


Products Used: 


Project Instructions: 
Other products: Brads, white cardstock, Copic Markers BV 0000 - 00 - 02 - 04, YG 21 - 25 - 67 - 63 - 95, Spellbinders Labels Thirty Six, gold glitter pen
Instructions: Take a piece of the Italiana Riviera Paper Collection and make a 6" by 6" card base. Take the matching card panel and trim it to 5 3/4" by 5 3/4". Add it to the front of the card. Stamp two of the grape clusters, four of the Large Triple leaf, and one of the Vining Foliage in black ink on white cardstock. Cut each image out with the matching die. Take the flower shaping kit and shape the flowers. Color them with Copic Markers. Cut the Large Triple leaf into individual leaves. Add each size together to make the flowers. Add a brad to the center of each one. Take paper from the paper collection and cut two of the Labels Thirty Six. Add double dots to the back of each one and add it to the card. Place the rest of the elements on the card as shown in the picture. Add gold glitter to the tips of the flowers.

Thank you for stopping by my blog!!
I always appreciate your amazing comments.


Wednesday, October 14, 2015

Welcome to this weeks post with Heartfelt Creations.
It is time for a new collection debut. It is so exciting to introduce it to you
the Italiana Riviera.
This is one amazing collection of stamps, dies, and papers. I just love how the grapes flow through the papers and those gorgeous leaves. It gives you the feel of walking through a grape vineyard. The wine bottle and glass is so charming and really adds the extra pop to your creation. The luscious purples pinks and greens just add to the beauty of each page. 
The stamps give way to so much creativity whether you are coloring or embossing they are just perfect. The leaf dies and flourishes are spectacular. I love coloring them, or placing them around my image. This collection really inspires me to create many different creations.

Thank you for stopping by my blog!! 
I hope this collection inspires you as much as it has me.
Stop by Heartfelt Creations blog for all of the inspiration by the rest of the Design Team.


Other products: Copic Markers BV 0000 - 01 - 02 - 04, G 14 - 16 - 21, BG000, E 34 - 35 - 37 - 51, N 0 - 02; purple, pink, white cardstock, glitter pen, Spellbinders Marvelous Squares, Classic Squares Small

Instructions: 
Take a piece of pink cardstock and make a 6" by 6" card base. Take a piece of the Italiana Riviera paper collection and cut a 5 1/2" by 5 1/2" layer. Cut two of the Italiana Grape Cluster, leaf flourishes. Add it to the back of the layer. Add Double Dots to the back. Take a piece of purple cardstock and cut the largest Marvelous squares, and a piece of pink cardstock and cut the medium Classic Square. Stamp the Grape Clusters and two of the glasses on white cardstock in black ink. Color them with Copic Markers. Cut the image and glasses out with the Italiana Grape Clusters Die. Add the three die cuts together and add Double Dots to the back. Add all of the elements to the card as shown in the photo, and add the two glasses to the right corner.

Have a wonderful and blessed week!

Wednesday, October 7, 2015

October 6, 2015 HC

Welcome to this weeks post with Heartfelt Creations. We are using the Enchanted Mum collection this week. Next week I look forward to showing you the new collection coming out.

I hope you enjoy this necklace I made using the Enchanted Mum flower.
Stop by Heartfelt Creations to pick up this collection. You won't be disappointed.

Don't forget to stop by Heartfelt Creations Blog for all of the creations by the rest of the Design Team, and a peak at the new collection coming out.


Project Instructions: 

Other products: Polymer clay, jewelry findings, chain, clasps, craft knife, roller, small glass bowl, leaf shape cutters
Instructions: Take the polymer clay and flatten it out evenly, onto the Scor-Mat. Take the Enchanted Mum stamp and stamp the middle flower on it in black ink. Press the Enchanted Mum die over the image and press down firmly. Cut any areas that did not cut thoroughly with a craft knife. Cut leaves and make small acorns with polymer clay. Take the piercing tool included in the Flower Shaping Kit, and make small holes in the leaves. Place the flower and leaves onto a glass bowl and cook according to the package directions. Take the leaves and acorns and add them to different lengths of chain. Glue a tube bead to the back of the flower to add the chain, leaves, and acorns to. Add additional chain to the flower and clasps for the necklace.
Thank you so much for stopping by my blog.

Wednesday, September 30, 2015

September 30, 2015 HC

Welcome to this weeks post with Heartfelt Creations. This collection is coming to an end soon, and I can't wait to show you the next one.
The Enchanted Mum collection has some amazing stamps, dies, and papers. I hope you have been able to get yourself this collection.
I hope you enjoy the card I made for you this week and are inspired to create something wonderful of your own.
Stop by Heartfelt Creations Blog for some inspiration from the rest of the Design Team, and a sneak peek of the Italiana Riviera coming soon.


Other products: Light purple cardstock (CS), purple gemstones

Instructions: Take a piece of the Enchanted Mum paper collection and make a 5" by 7" card base. Trim a card panel to 4 7/8" by 6 7/8", and add it to the card base. Take two card panels and add an 1/8" layer of light purple CS, to the back. Add Double Dots to the backs. Stamp the sentiment and three sets of Mums on paper from the paper collection in black ink. Cut them out with the matching die, and then add Double Dots to the back of the sentiment. Take the flower shaping kit and shape the flowers. Add three flowers to each flower. Glue them together and add a gemstone to the center. Add all of the elements to the card with Art Institute Glue.

Wednesday, September 23, 2015

September 23, 2015 HC

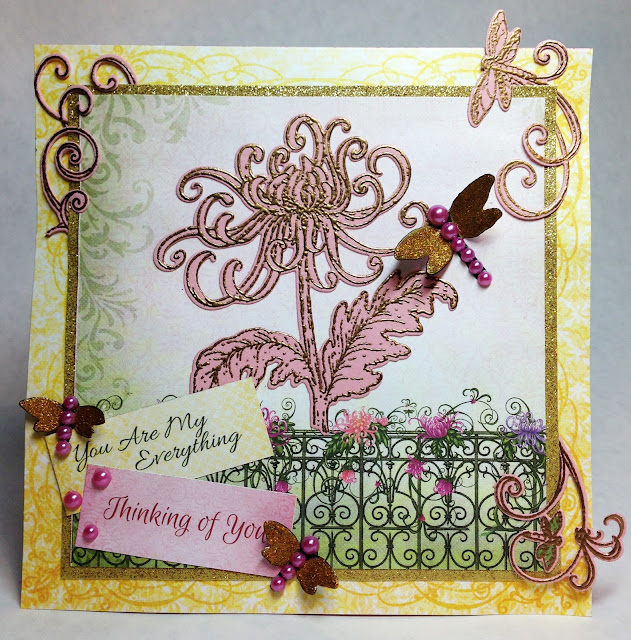
Welcome to this weeks post with Heartfelt Creations. I am using the Enchanted Mum collection, and with Fall just around the corner I decided to do some gold embossing. I hope you will stop by Heartfelt Creations blog and look at all of the beautiful projects by the rest of the design team.
Have a wonderful and blessed week.


Project Instructions: 

Other products: Gold glitter - white - pink cardstock (CS), gold embossing powder, pink flat back pearls, heat gun, gold glitter
Instructions: Take a piece of the Enchanted Mum paper collection and make a 6" by 6" card base. Cut a piece of glitter CS and trim it to 5 1/4" by 5 1/4". Cut a card front from the paper collection and trim it to 5" by 5". Stamp the images from the Enchanted Mum Cling Stamp Set onto pink CS, with the Essential Glue Pad. Cover them with gold embossing powder. Heat emboss it. Cut it out with the matching dies. Cut the flourish into four pieces. Stamp the Enchanted Dragonflies onto white CS with black ink. Cut them out with the matching die. Add Art Institute glue over the wings, and then add gold glitter to them. Allow them to dry then add pearls to the bodies. Cut two sentiments from the paper collection. Add all of the elements to the card with Art Institute Glue.
Thank you for stopping by my blog!!

Wednesday, September 16, 2015

Welcome to this week's post with Heartfelt Creations. I wanted to do something a little different this week. I decided to make a jewelry set with the new Enchanted Mums paper collection. I just love how it turned out.
I hope you will find time to stop by Heartfelt Creations blog to see all of the inspiration from the rest of the design team.


Products Used: 
Other products: Ultra thick clear embossing powder, skewer, jewelry findings, small green and pink beads, glitter embossing powder
Instructions: Take a piece of the Enchanted Mums paper collection and cut it in long triangles measuring 3/4" on one end, 1/8" on the other end, and 12" long. Wrap them starting with the 3/4" first around the skewer. Keep it lined up in the middle as you reach the other end. Add glue to hold the paper in place. Make enough beads for a necklace, earrings and a bracelet. For the smaller beads, make them 1/2" on one end and 1/8" on the other still measuring 12" long. For the beads on the earrings start with a 1/4" strip that has 1/8" at the other end and, 12" long. When you are done with the paper beads coat them in the Essential Glue Pad, then dip them in clear embossing powder. Heat emboss them. Then add a layer of glitter embossing powder, following the same steps above. Finally coat them one more time with clear embossing powder. String the paper beads, beads and findings to make a necklace, earrings, and a bracelet.
Thank you for stopping by my blog!!