Welcome to my blog. I would like to create a place where I can share my love of crafts with you. I started paper crafting in August of 2011. I just had my one year anniversary. I love making cards, doing scrapbook pages, creating flowers, quilling and many other crafts. I found out about greeting cards when watching a Stamp TV video a few months later. I am hooked on card making now. Love everything about it. I hope that you will join me in my love of crafts.
Showing posts with label Spellbinders. Show all posts

Tuesday, March 3, 2015

March 3, 2015

Welcome to this weeks post with Heartfelt Creations
I have made two projects this week. A card and some tags. On my first project I took strips of paper from the Butterfly Medley collection, and made my own designer paper, 
I hope you will try it out. It was a lot of fun to do. Stop by Heart Creations blog to see all of the amazing inspirations by the rest of the team.


Other Products: Neenah White cardstock (CS), Green - brown cardstock, Spellbinders Grand Circles - Grand Scalloped Circles, RRR brown with gold edging, Wink of Stella clear, white gel pen.
Instructions: Pick random pieces of paper from the Butterfly Medley paper collection. Trim them to 1/2" by 12", then take a piece of CS any color and trim it to 6" by 6". Center the first strip on the top right corner down to the bottom left corner, then glue it down. This will insure that all of your strips of paper will be straight. Take the rest of the strips and glue them to the card also, until the CS is covered completely. Turn the CS over on the back and cut all of the strips flush with the CS. Stamp the Dream in Beauty butterfly and stamp it on white CS with black ink. Color it with Copic markers YG25, 21, G05, 07, N0, N2, and the colorless blender. Cut/emboss the image with the smallest Grand Circle. Cut/emboss the smallest, Grand Scalloped Circle with green CS. Glue them together, and add Double Dots to the back. Cut/emboss the Lattice Piece from the Raindrops on Roses Die, in white CS. Cut it in half and add it to the card. Add the image over the Lattice piece. Place small white dots on the butterflies with the gel pen. Brush Wink of Stella over the butterflies. Tie the ribbon in a double bow and glue it to the card.
I made some tags for my second project.

Here is a close up of one of the tags.

Other Products: Memento Sweet Plum - Dandelion - Angel Pink inks, Clear Wink of Stella, Neenah White cardstock (CS), Copic Markers, Black flourish rhinestones (Michaels), finger sponges.
Instructions: Cut three tags from the Butterfly Medley paper collection, with the Classic Tag from the Luggage and Tag die. Sponge the pink one with Angel Pink, Summer Sky, and Rich Cocoa ink. Sponge the purple one with Sweet Plum, Dandelion, and Rich Cocoa inks. Sponge the peach one with Morocco, Bamboo Leaves, and Rich Cocoa inks. Stamp the butterflies in black ink, on white CS. Color them with Copic Markers. Peach butterfly E21, Y95, YR2, and E13. Blue butterfly BG2, 000, R83, 81. Purple butterfly V20, 25, Y11. Cut them out with the matching die. Shape the butterflies by wrapping their wings around a small pencil. Cut the rhinestone flourishes in small pieces and add them to the tags. Cover the butterflies with Wink of Stella, then add them to the tag as shown in the photo.
I hope you have enjoyed my projects this week.
Thank you so much for stopping by and leaving me your comments!!!

Wednesday, February 25, 2015

February 24, 2015

Welcome to this weeks post with Heartfelt Creations.
I am using the Butterfly Medley collection for my card today. I think it is one of favorites so far.
Love the butterflies and flowers.
I hope you will find time to stop by Heartfelt Creations blog to see all of the amazing inspiration
 I hope you enjoy what I have made for you this week, and are 
inspired to create something new.


Project Instructions:
Other Products: Memento Dandelion ink, Hot Fudge - Neenah White cardstock (CS), Spellbinders Grand Ovals - Grand Decorative Oval, Copic Markers - butterflies Y13, YR18, 04, YG13, E35, 37, 31 - Flowers Y11, 17 - leaves YG 25, 67, Y17 - grass E35, 31, 40, corner punch, Wink of Stella.
Instructions: Take a piece of the brown CS and make a 5 1/2" square card base. Trim a piece of the Butterfly Medley paper collection to 5 1/4" square, and sponge it with Memento inks. Glue it to the card base. Cut two pieces of brown CS to 3 1/4" by 3 3/4". Cut two card panels from the paper collection to 3" by 3 1/2", and sponge them with Memento inks. Glue them to the brown CS, and add Double Dots to the back. Glue Dewdrops the top and bottom corner. Add them to the card as shown in the photo. Stamp the Botanical Swirls flower and the Botanical wings, butterflies on white CS, with black ink. Color them with Copic Markers. Cut the butterflies with the matching die. Cut the image with the smallest Grand Oval. Cut the smallest Grand Decorative Oval with brown CS. Glue them together and add Double Dots to the back. Take the sentiment from the paper collection and add a brown mat to the back. Add the image, butterflies, and sentiment to the card as shown. Brush Wink of Stella over the butterflies.

Have a wonderful and blessed day!
Thank you for stopping by.
I appreciate all of your wonderful comments!!
Stop by Heartfelt Creations for a sneak peak at the next collection coming out.

Wednesday, January 7, 2015

January 7, 2015

Welcome to this weeks post with Heartfelt Creations!
I hope you are having a wonderful beginning to the New Year. It is bitterly cold here in Virginia.
This is the last week with the Romantique Garden Collection
Click on the link for a sneak peak at the new Birds and Blooms Collection 
I made a card for you this week. I hope you like it and are inspired to make something new too.
for all of the inspiration by Design Team.


Other Products: Spellbinders Grand Ovals - Grand Decorative Ovals - Curved Borders two, Eclipse Black - Heavenly White cardstock (CS), Copic Markers: Vase N0, 2 - 4 Wood W 1 - 3 - 5 - Flowers B0000 - 00 - 02 - leaves G 12 - 14, rhinestones, silver flat back pearls, Distress ink Pumice Stone.
Instructions: Take a piece of the Sweet Lullaby Paper and cut one sheet in half to make a 6" by 6" card base. Take black CS and cut/emboss two curved borders. Cut the second Decorative label in white CS. Stamp the Delicate Aster Vase, in black ink onto white CS. Color the image and cut/emboss it with the Second oval. Add Double Dots to both ovals. Cut two black and two white hearts from the Timeless Amour Die. Glue them together, then glue the two hearts together. Stamp the Thanks a Bunch Sentiment on white CS with black ink. Trim it down to 1 3/4" by 1" and add it on top of the two hearts. Add the black borders to the card base, then add the silver flat back pearls. Add both oval layers to the card, then add the sentiment as shown in the photo. Glue to rhinestones to the center of the flowers.

Wednesday, October 8, 2014

October 7, 2014

Hi, welcome to this weeks post with Heartfelt Creations. 
I am so excited to introduce you to the new All Geared Up collection. So shift your creativity into high gear because you are going to love it. 

This imaginative mix of gears, cogs, and mechanical flowers uses deep shades of rust, brown, teal, red and cream to create all of those steampunk, vintage, masculine, and mixed media projects. Don't forget about the girly grunge and so much more. 

The dies feature sprockets, gears, cogs, chains, license plates, and leaves for when you want to add some beautiful flowers to your art work. The stamps and papers in this collection are going to have your mind swimming with ideas. So start your engines and lets let the creativity begin. 
I hope you enjoy what I have made this week, and are inspired to create!!
Stop by Heartfelt Creations blog for more inspiration.

Other products: Three silver brads, ivory cardstock (CS), Copic Markers, Memento Tuxedo Black ink, Distress inks Tea Dye - Stormy Sky, Vintage Photo, heat gun.
Instructions: Make a 6" by 6" card base. Take a 6" by 6" card panel from the All Geared Up paper collection, and add it to the card base. Take the large square from the Cut Mat Create 2A die, and cut matching paper from the paper collection. Stamp the Nuts and Bolts image onto ivory CS with black ink. Color it with markers. Cut/emboss it with the large square from the Cut Mat Create 2B die. Sponge it with the distress inks. Glue the two squares together and add Double Dots to the back. Take the All Geared Up die and cut the matching cogs and wheels from photo. Color them with markers. Press them into the Essential Glue Pad and then sprinkle UTEE on top. Heat set. Repeat it three more times. Stamp the Sentiment URGR8T, onto ivory CS with black ink. Use the matching die to cut it out. Sponge it with the distress inks. Add all of the elements to the card as shown in the photo.

Other products: Black rhinestones, silver flat back pearls, ivory cardstock (CS), silver - black glitter embossing powder, heat gun, Memento Rose Bud - Desert Sand - Rich Cocoa inks, Spellbinders Labels 8.
Instructions: Make a 7" by 5" card base. Cut a 7" by 5" card panel from the All Geared Up paper collection, and add it to the card base. Stamp the Nuts And Bolts image on ivory CS, with Essential Glue Pad. Add silver embossing powder and heat set. Cut/emboss it with the second Labels eight, then add Double Dots to the back. Take the All Geared Up Die and cut the cogs, wheels, and chain links. Cover each one with the Essential Glue Pad and then add the embossing powder. Heat set. Repeat this three more times. Add all of the elements to the card as shown in the photo.
Thank you so much for stopping by!!!
I appreciate all of your comments.

Wednesday, August 27, 2014

August 26, 2014

It's Wednesday and it is time for another post with Heartfelt Creations
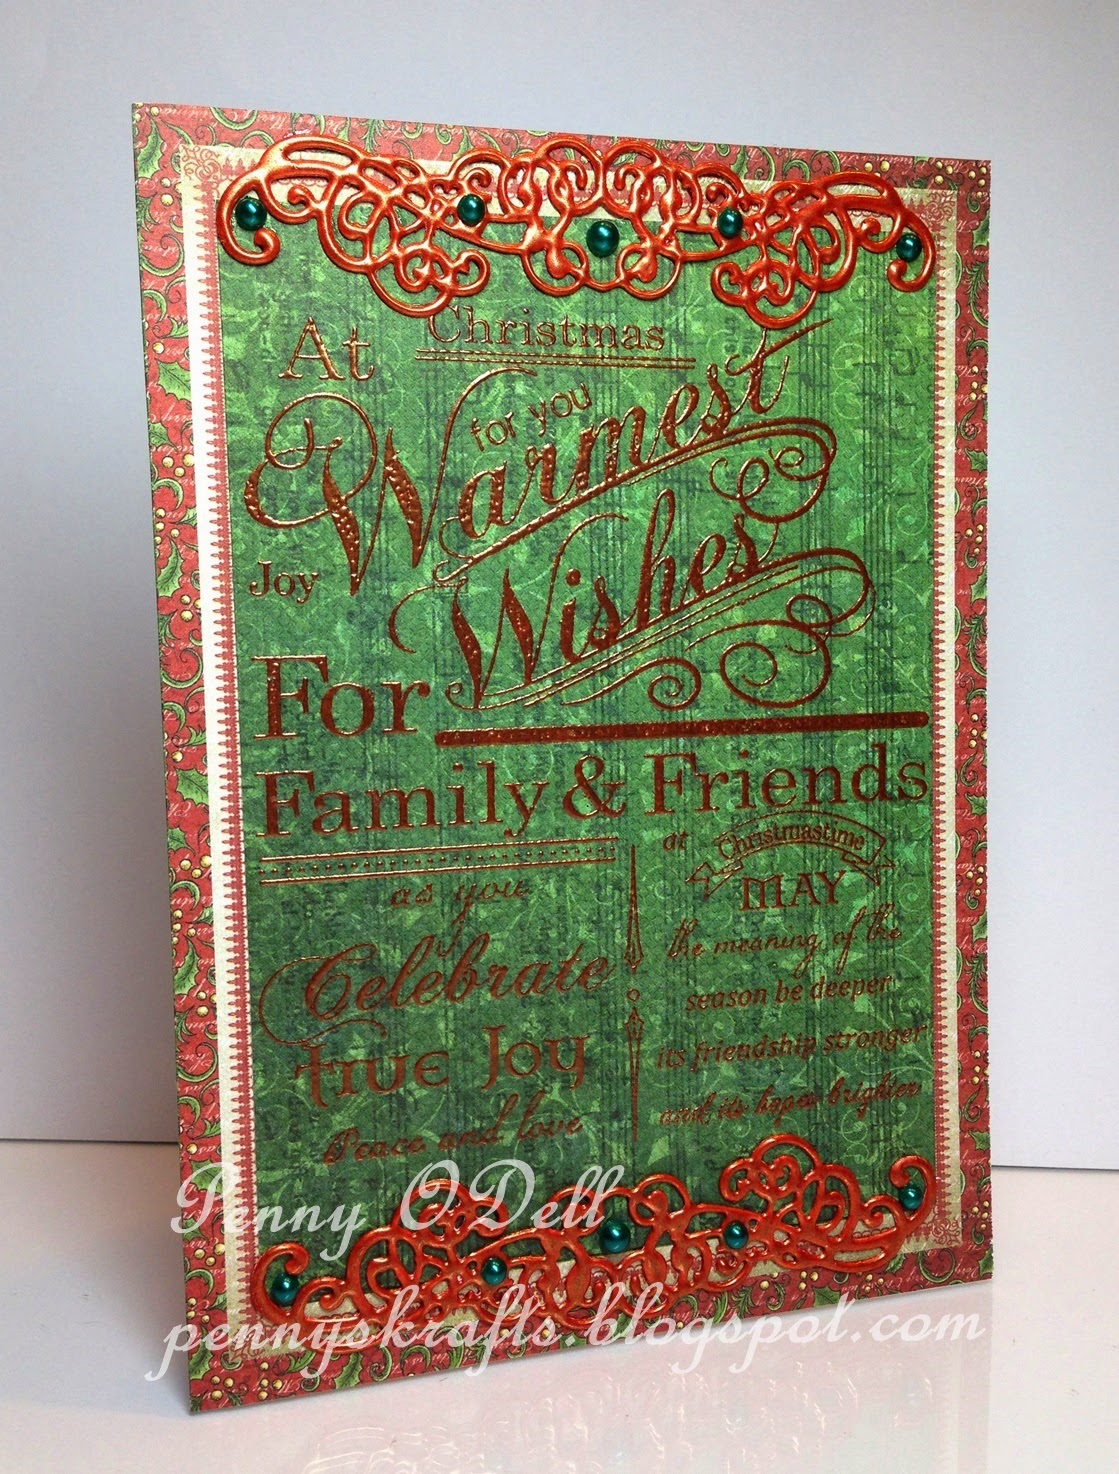
I am having so much fun with the Festive Christmas Collection, but soon a new collection is coming out. It is going to be amazing. Really!!!! Ok, so I made three cards this week. I hope you enjoy them, and are inspired to create something beautiful this week.
Stop by Heartfelt Creations blog and see all of the gorgeous creations.


                                                                          Essential Glue Pad

Project Instructions:

Other Products: Green - white - silver cardstock (CS), Memento Tuxedo Black and New Sprout inks, super fine embossing powder, heat gun, red rhinestones, green and red ribbon.
Instructions: Make a 7" by 5" white card base. Take a 7" by 5" card panel from the Festive Christmas designer paper, and glue it to the front of the card base. Cut a 9" piece of both ribbons and add them to the card. Stamp the sentiment from the Festive Candlelight stamp set on white CS, with black ink. Use the second die from the Marvelous Squares to cut it out. Then while it is still in the die sponge it with green ink. Add Double Dots to the back, and place it on the card. Stamp the Poinsettia with the glue pad, then add the embossing powder. Heat set it with a heat gun. Cut them out with the Sun Kissed Fleur Die. Mold and shape the flowers and add rhinestones to the centers. Stamp the small Holly Berry with black ink and use the matching die to cut them out. Mold and shape them, then add rhinestones to them. Add the flowers and leaves to the card.

Other Products: Spellbinder Heirloom Ornaments - Holiday Tree, ultra fine glitter, silver embossing powder, double sided tape, memento inks and markers, white cardstock (CS), white ribbon.
Instructions: Take a piece of white CS and make a 5" by 7" card base. Take a 5" by 7" card panel from the Festive Christmas collection and add to the front of the card base. Stamp the O Little Town image onto white CS with the glue pad. Add the embossing powder and heat set. Color it with your favorite memento markers. Sponge around the edges with Dandelion and Desert sand inks. Add Double Dots to the back. Take a piece of white CS and cover it with double sided tape, leaving the cover over the front side. Die cut the two small Christmas ornaments. Add glitter to them as shown in the photo. Cut/emboss one Lace flower from the Arianna Lace die. Cut it in half. Add all of the elements to the card, then add the bows. Use the photo as your guide.


Other Products: White cardstock (CS), green rhinestones, Pearl Carnelian embossing powder.
Instructions: Make a 5" by 7" white card base then take a 5" by 7" card panel from the Festive Christmas collection and stamp the background stamp with the glue pad. Cover it with embossing powder and heat set. Glue it to the front of the card base. Cut/emboss two of the Delicate Flourishes from HCD 751. Then stamp the glue pad over them. Add embossing powder and heat set. Add the green rhinestones.

Thank you for stopping by!!!
I am entering these cards in the following challenges.